11 Secrets for Creating Epic Photos for Your Instagram Profile Picture

So looking at your social media profiles, you decide you need to update your main Instagram profile picture. But you don't want mediocre... you want Amazing! Why? Because you deserve it! AND now you will know the little "secrets" that the Kardashians and Pros know in this article!
They know crafting the perfect profile picture is a few more steps, but these are the difference from a lack luster B-List photos and a jaw dropping photo that sets yours apart from everyone else.
Now you could use what most people do, just go and use one of your Instagram photos that has the most likes and comments, and just use that right? Wrong! Why? Because those likes numbers are not really accurate. They are biased, they are your friends, your family, your friends of friends, and a few random weirdos that you don't know.
Again, you want the Very Best photo. It can be used for your Instagram, LinkedIn, Tiktok, Facebook, Business Cards, Dating Profile, etc. So these secret steps will make all the difference.
So lets get to it:
Secret #1: You will need a lot of photos.. and I mean A LOT! We are talking like 100 minimum. Taking 1000 photos in multiple locations or backgrounds is best. The reason is because the human face has the ability to make over 10,000 expressions, and can make 2-3 expressions in per second. Also known as micro expressions, that last between .5 - 4 seconds, so you need a a huge amount of photos to "capture" the best one(s). You will be amazed at results of this process, please don't skip it.
Secret #2 The best photos are usually with your face not too close to the camera, and you are smiling or partial smiling and spontaneous (or appear to be) they are kind of a "staged spontaneous" where they are preplanned but look in the moment. Then mix it up with some shots looking directly at the camera, but many shots not looking directly at the camera while smiling.
(Pro Tip): Without looking directly camera, (look slightly away, 30-45 degrees) Visualize like you are seeing and talking to your favorite celebrity crush like you know each other! Your eyes will Light Up and the camera will catch it.
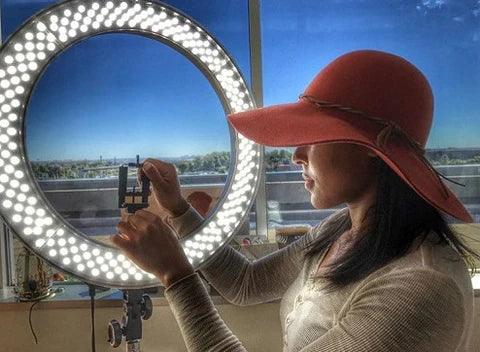
Secret #3 The camera quality of the newer smartphones is great. However when you touch the shutter button on your phone, it can slightly move and causing a blurry photo. Instead, a better way is to mount your phone to your ring light or selfie stick or tripod and use the Bluetooth Shutter Remote so you shoot while your phone is secure, not touched or moving. This is best for selfies and shooting a lot photos very very quickly.
Secret #4 Now one of the biggest secret rules in elite photography training, that is in plain sight but is never talked about is this: "Nail Your Background!" That means that is the first thing you ask when looking at your photo is "Did I nail my background?" Which means Vibrant Colors and/or a beautiful unique spot, travel destination, or a nicely decorated corner in your home again with lots of color that contrasts yet accentuates the subject... you! This is what all the top travel bloggers and celebrity photographers live by.
Secret #5 Ok, now go through your newly taken photos that you took with the above pro tips and choose your favorite top 3 photos. Ok, this is not really a secret but its on the list.
Secret #6 Take those photos and upload them into a website called photofeeler.com where your photos can be independently rated and is unbiased data from people who do not know you. Its free to use but they have a paid version also.
Secret #7 Don't take ANY of the ratings or data personally, is just used for your research only. You are just collecting unbiased data on your photos.
Secret #8 Choose the highest rated photo from Photofeeler who uses 0-100 scores (there are 3 categories, Smart, Trustworthy and Attractive) If you have a photo where all 3 of the scores in the high 90's mission accomplished, that is your photo! But if they are not in the high 90's its time to have them touched up.
Secret # 9 You can touch them up using a Canva or head over to Fiverr and book for a Photo editor who has a lot of experience with photoshop. I usually look for the most reviews and highest rated. They are usually very inexpensive, reasonable and want to do good work.
Secret #10 Ask them for a color correction, and have the background slightly blurred. if you have an iPhone, shooting in Portrait mode automatically does this during your shoot. This will make you pop out of the photo.
Secret #11 Then go back to Photo feeler and reupload the newly revised photos and see how the scores have improved. Your target is ideally all 3 categories score over 90. This puts your photos in the top 10% which is exactly when you want to be.
A couple bonus tips!
- Generally, when taking photos of your face capture your left side. Wake Forest University studies have shown the left side of a persons face is usually best. You have heard the saying "show me your best side" I don't know how that is possible because all of your sides are best! 😉
- During your shoots capture a couple behind the scenes type shots, these are usually great for Instagram stories and has a subliminal "this person is famous" vibe because 99% of people don't have these shots taken of them.
- This goes without saying, but make sure your lighting is on point. Whether you use lighting equipment or when outside a slightly cloudy day is good for indirect lighting. However if possible sunrise or sunset is best for getting the best colors. Some lighting equipment is Bi-Color or has an orange filter to simulate this effect on demand.
That's it! That is your new new social media profile picture! These little steps will dramatically improve your results, it may take a few try's but will be well worth it.
Ps If you liked this blog please let us know by leaving us a comment!